
Just a couple of days ago, the Angular team released version 15. One feature that I have been looking forward to getting my hands on is the new NgOptimizedImage directive.
This new directive makes it super easy to use best image loading practices without needing to do anything special, other than just using a new directive.
I was ready to update my personal site from Angular 14 to 15, and in the process implement this new directive on the page with the most images, my blog archive page. This page lists many posts with a featured image next to each of them.
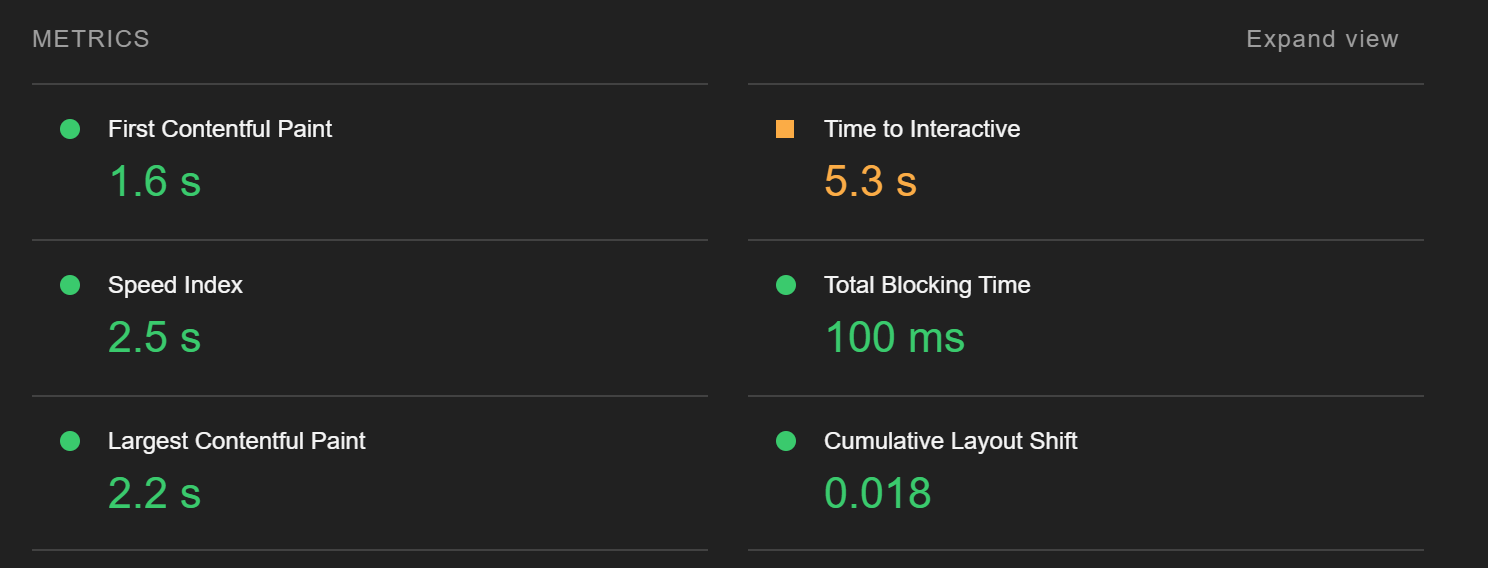
Before Performance
My site is already quite fast, thanks to the power of the Angular static site generator, Scully. I also host my site using Amazon S3, which has been super reliable and fast. So, starting out with my Angular 14 build with mostly standalone components, I ran my first lighthouse test on my production site.
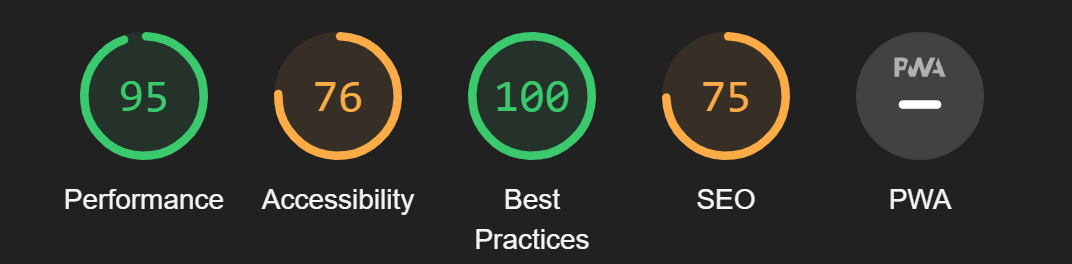
And here are some details on the performance metrics:
Simple Changes
So how do we implement the NgOptimizedImage directive. directive?
Well, it's quite simple! All we need to do is import NgOptimizedImage into our standalone component (or module
if you haven't made the switch yet). Next, we need to change our src on our image to ngSrc. The last step is
that NgOptimizedImage does require you to specify the requested width and height attributes.
That's it! Here's a piece of code from my site that is using NgOptimizedImage:
import { Component } from '@angular/core';
import { CommonModule, NgOptimizedImage } from '@angular/common';

@Component({
  selector: 'app-post-box',
  standalone: true,
  imports: [CommonModule, NgOptimizedImage],
  template: `
    <div *ngIf="post" class="relative bg-gray-800 my-8">
      <div class="h-56 sm:h-72 md:absolute md:left-0 md:h-full md:w-1/2">
        <img class="w-full h-full object-cover" [ngSrc]="postImage" width="500" height="300" alt="Post Image" />
      </div>
    `,

  // there's more that I removed here for the example
})
After Performance
Once this was done, I simply committed my code and allowed Github Actions to deploy to S3. Then, I re-ran the same lighthouse test on the production site to see the improvements:
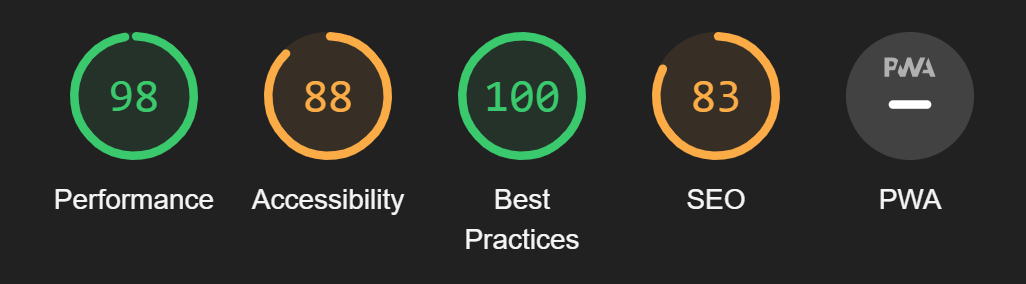
And the detailed performance metrics:
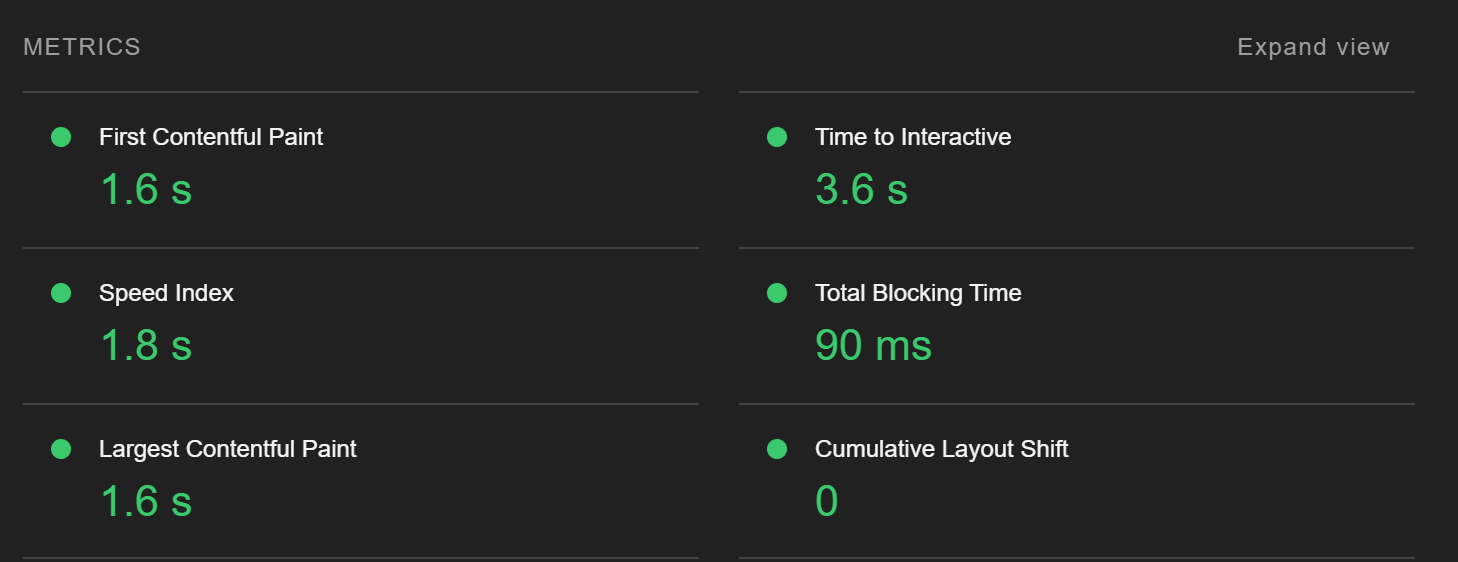
This is a pretty big improvement in the Time to Interactive and Largest Contentful Paint metrics! It's so easy to achieve this with a simple directive provided by Angular. I highly suggest trying it out on your own websites and apps built with Angular to see what kind of performance improvements you get!