
Signal-Store Workshop Instructions
The code repository can be found here.
1. Create the store
Create a new file within state/ called store.ts.
Define the state of our application.
- Create a type called
Stateand give it two properties- status - this will be typed to either “loading”, “success”, or “error” and will be used to let the application know what state we are in with regards to loading the application’s data
- items - this will be typed to an array of
StoreItem
- Create an object that is of type
Statethat will be our initial state we want our store to be in when it is instantiated.
import {StoreItem} from '../models/item';

type State = {
  status: 'loading' | 'success' | 'error';
  items: StoreItem[]
}

const initialState: State = {
  status: 'loading',
  items: [],
}
Next, create the store using the signalStore() function.
import {StoreItem} from '../models/item';
import {signalStore} from '@ngrx/signals';

type State = {
  status: 'loading' | 'success' | 'error';
  items: StoreItem[]
}

const initialState: State = {
  status: 'loading',
  items: [],
}

export const AppStore = signalStore(

)
signalStore will return an injectable class and will have signals and methods based on the configuration we provide it.
We will want this store to be a singleton, so similar to how we provide an Angular service in root, we will do that with our signalStore.
export const AppStore = signalStore(
  {providedIn: 'root'},
)
Let’s define our state by calling withState() feature and passing in our initial state. This will create signals for both the status and items properties.
export const AppStore = signalStore(
  {providedIn: 'root'},
  withState(initialState),
)
By injecting the AppStore into our application, we will have access to the status signal which is of type 'loading' | 'success' | 'error', and the items signal which is of type StoreItem[].
2. Initialization Hook
Let’s initialize our store with some hard-coded data to work with for now. NGRX Signal-Store has two lifecycle hooks, onInit()and onDestroy(). These can both be configured within the withHooks feature.
onInit and onDestroy have access to anything that has been configured before the withHooks feature. This will be a common theme when working with NGRX Signal-Store, and because of this, we will add this below withState so we have access to those two state signals.
export const AppStore = signalStore(
  {providedIn: 'root'},
  withState(initialState),
  withHooks({
    onInit(store) {

    }
  })
)
Let’s pull in the data store in data/item-data.ts and update our state with it. We will need to use a special function called patchState to update the state in our store. patchState takes two parameters: the first is the store we are updating, and the second is a factory function that returns a partial version of our state. This allows us to easily update the properties we want, without needing to use the spread operator for all of the remaining properties.
withHooks({
  onInit(store) {
    patchState(store, () => ({items: serverItems}))
  }
})
3. Use the store within the application
Open up the shop.component.ts file. You will notice that the template is hardcoded to show the “Loading…” message, and is looping over an empty array of items. Let’s inject our store and show the items that we have loaded into the items signal.
This image will show the types of each signal we are pulling off of the store:
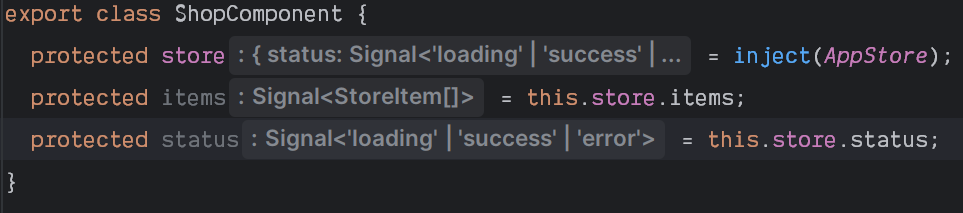
Next, update the template to use the signals from our store. Here is the updated component’s code:
@Component({
  selector: 'app-shop',
  imports: [
    ShopItemComponent
  ],
  template: `
    <h3>Shop Page</h3>
    <section class="items">
      @if (status() === 'loading') {
        <p>Loading...</p>
      }
      @for(item of items(); track $index) {
        <app-shop-item [item]="item" />
      }
    </section>
  `,
  styles: `
    section.items {
      display: grid;
      grid-template-columns: repeat(2, auto);
      grid-gap: 2rem;
    }`
})
export class ShopComponent {
  protected store = inject(AppStore);
  protected items = this.store.items;
  protected status = this.store.status;
}
4. Update items added/removed from cart
We need to expose some methods that the store will use to update the state of individual items as they are added or removed from the cart.
The withMethods feature will look slightly different than withHooks, as it takes in the store parameter as well as anything you need to inject. We will get to injecting services a bit later in this workshop.
export const AppStore = signalStore(
  {providedIn: 'root'},
  withState(initialState),
  withMethods((store) => ({
    // methods will go here
  })),
  withHooks({
    onInit(store) {
      patchState(store, () => ({items: serverItems}))
    }
  })
)
Create a method that will be used for updating the item’s inCart status. We will need to pass it the item that is being updated, and whether or not it is being added to the cart (false can represent removing it from the cart).
withMethods((store) => ({
  toggleInCart(itemToUpdate: StoreItem, addToCart: boolean) {

  }
})),
Updating state needs to be done in an immutable way. We will create a new array of items, with the item to be updated changed. Then, we can pass that updated array into a patchState updater.
withMethods((store) => ({
  toggleInCart(itemToUpdate: StoreItem, addToCart: boolean) {
    const items = [
      ...store.items().map((item) =>
        item.id === itemToUpdate.id ? {...item, inCart: addToCart} : item
      )
    ];
    patchState(store, () => ({items}));
  }
})),
Let’s put this function to use within the shop-item.component.ts file. First, we need to inject the store.
export class ShopItemComponent {
  item = input.required<StoreItem>();
  store = inject(AppStore);
}
Then, we can add a click event to the two buttons for adding and removing from the cart in the template.
@if (!item().inCart) {
  <button (click)="store.toggleInCart(item(), true)" mat-flat-button>Add to Cart</button>
} @else {
  <button (click)="store.toggleInCart(item(), false)" mat-button>Remove from Cart</button>
}
You should be able to now click the “Add to Cart” button in the UI and see it switch to “Remove from Cart”, and visa-versa.
5. Computed Signals
Now that we can add items to the cart, we have several places within our app that need to reflect those changes. The toolbar needs to show the number of items in the cart. The cart page needs to show which items are in the cart, as well as the total price for those items.
The withComputedfeature is similar to withMethods, where it takes in the current store object, and then anything that needs to be injected.
export const AppStore = signalStore(
  {providedIn: 'root'},
  withState(initialState),
  withComputed((store) => ({

  })),
  withMethods((store) => ({
    ...
  })),
  withHooks({
    ...
  })
)
Here we can define our computed signals, very much like in vanilla Angular. Let’s create one for the items that are in the cart.
withComputed((store) => ({
  itemsInCart: computed(() => store.items().filter(item => item.inCart)),
})),
Now, let’s update the cart.component.ts file to use this instead of the hardcoded empty array so we can see our items that are in the cart.
export class CartComponent {
  protected store = inject(AppStore)
}
@for (item of store.itemsInCart(); track $index) {
  <app-cart-item [item]="item" />
}
If you test this out, you will find that clicking the “Remove from Cart” does nothing. The cart-item.component.ts file will need to be updated to use the previously created method to remove items from the cart.
6. Cascading Computed Signals
The two other computed values we need is the number of items in the cart for the toolbar, and the total price for the cart page. We would like to reuse the itemsInCart computed signal. However, we do not have access to that signal within the withComputed feature. We can get around this by creating a second withComputed feature, and if we put it after the first one, we will then have access to any signals that have been created in the first.
Create the second withComputed and add the two signals that we need.
withComputed((store) => ({
  itemsInCart: computed(() => store.items().filter(item => item.inCart)),
})),
withComputed((store) => ({
  totalItemsInCart: computed(() => store.itemsInCart().length),
  totalPrice: computed(() => store.itemsInCart().reduce((acc, curr) => acc + curr.price, 0)),
})),
Update the cart.component.ts file to display the total price. There is a hardcoded @if (true) that can be updated to only display the total price if there are any items in the cart.
Next, update the toolbar.component.ts file to display the number of items in the cart inside the badge on the shopping cart icon.
7. Simplify Collections with Entities
Entities allow us to handle collections much easier. Let’s convert our items in our store into entities. First, remove them from the State.
type State = {
  status: 'loading' | 'success' | 'error';
}

const initialState: State = {
  status: 'loading',
}
Next, use the withEntities feature, giving it the type of the collection.
export const AppStore = signalStore(
  {providedIn: 'root'},
  withState(initialState),
  withEntities<StoreItem>(),
  ...
}
By doing this, we still have access to the items signal, but it has been renamed entities() . We are also given two new signals, ids() which gives us an array of ids for our items, and entityMap() which gives us the ability to access any of these items based on their id. More information can be found here: https://ngrx.io/guide/signals/signal-store/entity-management#entity-management
Update the shop.component.ts file to use the entities() signal instead of items().
Next, we need to change our store a bit to work with entities. We now have access to a group of helper functions that make working with collections much easier.
Update the toggleInCart() method to use the updateEntity helper function within patchState.
toggleInCart(itemToUpdate: StoreItem, addToCart: boolean) {
  patchState(
    store,
    updateEntity({id: itemToUpdate.id, changes: {inCart: addToCart} }),
  )
}
This is much more readable! The onInit hook also needs to be updated, and we can use setEntities here.
withHooks({
  onInit(store) {
    patchState(
      store,
      setEntities(serverItems)
    )
  }
})
With these simple refactors, your app should still work exactly the same.
8. Loading Data Asynchronously
In a real project, you will fetch the data in your application from a server.
Within the item-data.ts file, create an injectable class that returns the serverItems within a promise, and a 2 second delay to simulate loading from a server.
@Injectable({ providedIn: 'root' })
export class ApiService {
  load(): Promise<Item[]> {
    return new Promise((resolve) => {
      setTimeout(() => {
        resolve(serverItems);
      }, 2000);
    });
  }
}
Update the withMethods feature signature to inject in this new service.
withMethods((store, api = inject(ApiService)) => ({
...
}),
This is an example of how injection works within NGRX Signal-Store, and can be used in other features such as withComputed .
In this first example, we will work with promises. Create an async function called loadData and fetch the data from the ApiService, setting the entities and updating the status.
async loadData() {
  await api.load()
    .then(items => patchState(store, setEntities(items), {status: 'success'}))
    .catch(() => patchState(store, {status: 'error'}));
}
Be sure to update the onInit hook to call this function when the store is initialized. Your UI should now show the “Loading…” text for two seconds, and then show the items.
9. Loading Data with Observables
If you are using RxJS in your application, NGRX Signal-Store can handle that as well. Update the ApiService to use an Observable instead of a promise.
@Injectable({ providedIn: 'root' })
export class ApiService {
  load(): Observable<Item[]> {
    return of(serverItems).pipe(
      delay(2000)
    )
  }
}
Update the loadData function to utilize rxMethod in order to tap into RxJS, and load the data.
loadData: rxMethod<void>(
  pipe(
    switchMap(() => api.load()),
    tap({
      next: (data) => patchState(store, setEntities(data), {status: 'loading'}),
      error: () => patchState(store, {status: 'error'})
    })
  )
)
10. Custom State Updaters
It is recommended to create custom updaters, as they can be tree-shaken. We will create two updaters for updating the status using custom state updaters.
Create two functions, one for updating the status to error and the other to success, and these will return a type of ParitalStateUpdater . We give it the type of State we are using for the store so that we are type-safe in our updaters.
These functions simply return an arrow function. The parameter passed to this is the current state. This is demonstrated in the code below, although we are not using any properties from the current state.
export function setLoadError(): PartialStateUpdater<State> {
  return (state) => ({status: 'error'});
}

export function setLoadSuccess(): PartialStateUpdater<State> {
  return (state) => ({status: 'success'})
}
Next, we can update our patchState to use these updater functions. This further makes our code more readable (and testable as we can export and write simple unit tests against them).
loadData: rxMethod<void>(
  pipe(
    switchMap(() => api.load()),
    tap({
      next: (data) => patchState(store, setEntities(data), setLoadSuccess()),
      error: () => patchState(store, setLoadError())
    })
  )
)
11. Custom Features
Custom features are way to split up a large store into smaller bits, but also allows us to write reusable code for other stores.
Inside the /state directory, create a shop-store.ts file.
Let’s create a new feature for our shop items. To conform to naming conventions, name the feature starting with the word with.
export function withShopItems<_>() {
  return signalStoreFeature(

  )
}
Simply cut and paste all of the configuration (except the {providedIn: 'root'} ) we set up in our global store into this new feature. Also copy the State, initialState, and partial state updater functions.
Your new shop-store.ts file should look like this.
type State = {
  status: 'loading' | 'success' | 'error';
}

const initialState: State = {
  status: 'loading',
};

export function withShopItems<_>() {
  return signalStoreFeature(
    withState(initialState),
    withEntities<StoreItem>(),
    withComputed((store) => ({
      itemsInCart: computed(() => store.entities().filter(item => item.inCart)),
    })),
    withComputed((store) => ({
      totalItemsInCart: computed(() => store.itemsInCart().length),
      totalPrice: computed(() => store.itemsInCart().reduce((acc, curr) => acc + curr.price, 0)),
    })),
    withMethods((store, api = inject(ApiService)) => ({
      toggleInCart(itemToUpdate: StoreItem, addToCart: boolean) {
        patchState(
          store,
          updateEntity({id: itemToUpdate.id, changes: {inCart: addToCart}}),
        );
      },
      loadData: rxMethod<void>(
        pipe(
          switchMap(() => api.load()),
          tap({
            next: (data) => patchState(store, setEntities(data), setLoadSuccess()),
            error: () => patchState(store, setLoadError())
          })
        )
      )
    })),
    withHooks({
      onInit(store) {
        store.loadData();
      }
    })
  )
}

export function setLoadError(): PartialStateUpdater<State> {
  return (state) => ({status: 'error'});
}

export function setLoadSuccess(): PartialStateUpdater<State> {
  return (state) => ({status: 'success'})
}
Inside of our completely gutted AppStore, we can now use withShopItems() like we would any of the other features, such as withState, withComputed, etc.
Here is our simplified store:
export const AppStore = signalStore(
  {providedIn: 'root'},
  withShopItems(),
);
Your app should still work exactly the same.
12. Intro to Deep Signals
Deep Signals allows us to work with properties of objects in a performant way using signals.
Create a new model for a User, and feel free to give it any properties you wish.
export type User = {
  id: number;
  username: string;
  firstName: string;
  lastName: string;
}
Create a new feature that will store user data. The state of this store will contain our user and nothing more. We’re just going to hard code the values here.
user-store.ts
import {signalStoreFeature, withState} from '@ngrx/signals';
import {User} from '../models/user';

type State = {
  user: User
}

const initialState: State = {
  user: {
    id: 42,
    username: 'cperko',
    firstName: 'Chris',
    lastName: 'Perko',
  }
}

export function withUserStore<_>() {
  return signalStoreFeature(
    withState(initialState),
  )
}
Then, add this feature to our global store.
export const AppStore = signalStore(
  {providedIn: 'root'},
  withShopItems(),
  withUserStore(),
);
Let’s update the toolbar.component.ts template to display a profile icon. We will add the actual username shortly.
<mat-toolbar>
	<div class="left">
	  <h3>Demo Shop</h3>
	  <a mat-button routerLink="/">
	    Store
	  </a>
	</div>
	<div class="right">
	  <a mat-icon-button routerLink="/cart">
	    <mat-icon [matBadge]="store.totalItemsInCart()">shopping_cart</mat-icon>
	  </a>
	  <mat-icon>account_circles</mat-icon>
	  <span><!-- username will go here --></span>
	</div>
</mat-toolbar>
If we try to access the user signal, you will notice it is typed to a DeepSignal.

If we try to access the user.username property, you will notice that it is typed to a Signal.

What DeepSignal is doing here, is making every property within the object a signal. This means that if we are using the username in our template, and the user changes something else on the user object, such as the first or last name, this signal will not be updated, and thus not requiring a re-render of the template.
Let’s update our template and display the username within our app.